ORCAS ISLAND MURAL
July 2011
I was commissioned to paint a new mural on Orcas Island...the 2nd such visit I had the pleasure to plan. The project? Painting the side of a building that needed doctoring. So...I suppose The Doctor Is In!
STEP 1:
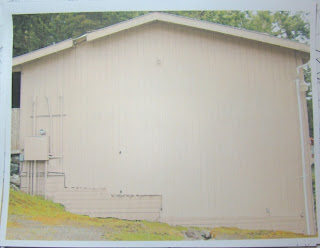
Get photos. Fortunately, the Innkeeper took a couple of good photos. I lost one in editing, but here is the gist of the project:
As you can see, the side of this building has SERIOUS problems. Can it be fixed???
STEP 2:
I edited the photo (the original photo...not this one), cloning out the trellises and the signs, etc. See? Even the TRUCK is gone!
This is cool..... a BLANK CANVAS! :)
STEP 3:
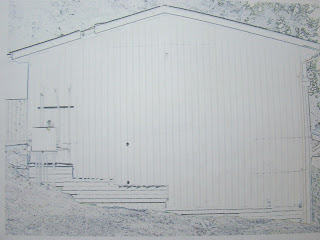
In my image editing software, I transformed the above photo into a sketch, like this.....
STEP 4:
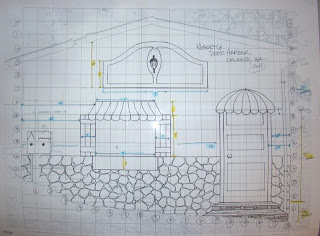
Then I started drawing, by hand, getting the gist of what I want to create. The Innkeeper thought a cute cafe look would be neat...since there is no restaurant on the property. I drew it on the photo. This is what I came up with...in color....on the printed photograph. Notice how the icky, messy-looking brick "disappears" with the stonework. The high middle decorative piece will be a cutout of outdoor siding and installed on the building...I don't particularly want to be that high on uneven terrain... and that "lamp" therein is a real lightbulb...but w/some creative painting, it will look like a streetlamp. The birdhouses to the R & L of the tree (at L) is the electrical box, and the pipes will be utilized as the trunk of the tree and birdhouse posts.
Step 5:
Even though it seems like a lot of work, it isn't really to someone who loves to doodle..... From here, in MSPublisher, I overlaid the sketch with a grid, to scale, of actual footage. This is 18' w x 15' h. (and YES a scaffold will be used!) I then printed the sketch (in Step 4) on 4 pages. Here I measured where each item would go, with the exception of plants and future animals.
What will come next??? Stay tuned for STEP 6!!!
STEP 6
Drive to Orcas Island and get it done. July 2011.
When I arrived on the island on July 18th, I was beset with my first [major] setback... the bottom of the building was covered with falling-off siding, a crawlspace entrance that was not secured, and at least a couple dozen telephone/cable wires that were unsightly. I had to alter my plan. So, as I began to paint on Tuesday, 7/19, I started with the stones, beginning about 30" from the uneven grass and rocks.
As I painted, I was beset with yet another MAJOR problem. This building houses the maintenance/housekeeping staff of the resort. (My initial drawing was to incorporate a Cafe theme to the building.) HOWEVER..... As the resort contains parking for the Deer Harbor Marina at the bottom of the hill, there are numerous folks looking for a place to eat; the Resort has no such facility. Hence, after being asked (as if I were an employee of the resort) where the Restaurant/Cafe is...I decided that to make this mural a Cafe would not be kind to the residents of the building... Could you imagine the number of knocks on the doors looking for a bite to eat? Hence, my revised plan was to build on the name of the building, "Carriage House". Thus, in keeping with the historical nature, I decided to go for it.
Days 1-5
Blocked in the windows...added curtains
Added the black/white awnings, window boxes,
flowers, roses
Better view of window
Roses
Close up of purple pansy....painting on house siding
is not easy.... so it doesn't look great close up...
like a Monet--stand back and look!!!
Tulips
Days 6-10
The electrical box, transformed into a 3-house birdhouse.
And...racccoons...
.....and birdies.........
I added some blue ledges on which to place plants, etc.
A welcome sign
The big Carriage House sign
Day 11...the FINAL DAY
Added Madrona Trees...utilizing the unsightly pipes...
THE FINAL PIC:
~~~~~~~~~~~~~~~~~~~~~~~~~~~~~~~~~~~~~~~~~~~~~~~~
ANOTHER MURAL'S BIRTH
TRANSPORTATION DEPARTMENT MURAL
Glendale, AZ
I was very excited to paint this mural for the transportation department at a school district...it is something I'm not accustomed to...very bright, vibrant, and whimsical. I planned this painting this on 1/8" hardboard, a Moveable Mural, as shown on my Moveable Murals page. The director wanted it to be fun, lively, and whimsical. I came up with a drawing the very next day, and he really liked it. This is the drawing:
Desert scene, as is typical of Arizona. What is not typical is the the actions of the kids on the bus. The idea for the mural is just fun, goofy stuff. (And no, this is not acceptable behavior for bus riders!!)
First, since it is 4' x 8', I had to make the easel.... a BIG easel...
And, of course protect the walls of my pink & white office!
On to painting!...............
(click on each image to view larger image)
DAY 1
DAY 2
DAY 3
DAY 4
Some details, now that more detail is added:
DAY 5.....Oh, I think a mural is being BORN!!!!!
FINAL DAY.....Yes, it is done!!!!!!!!!!!!!! WooHoo!!!
Some close-ups


